|
|
In central warehouse
|
Today (february 3) * | Free |
|
|
|||
|
|
Ar kurjeru visā Latvijā
|
Tomorrow (february 4) * | From 3,99 EUR |
|
|
|||
|
|
Piegādes punktos
|
Tomorrow (february 4) * | From 2,29 EUR |
 Read more


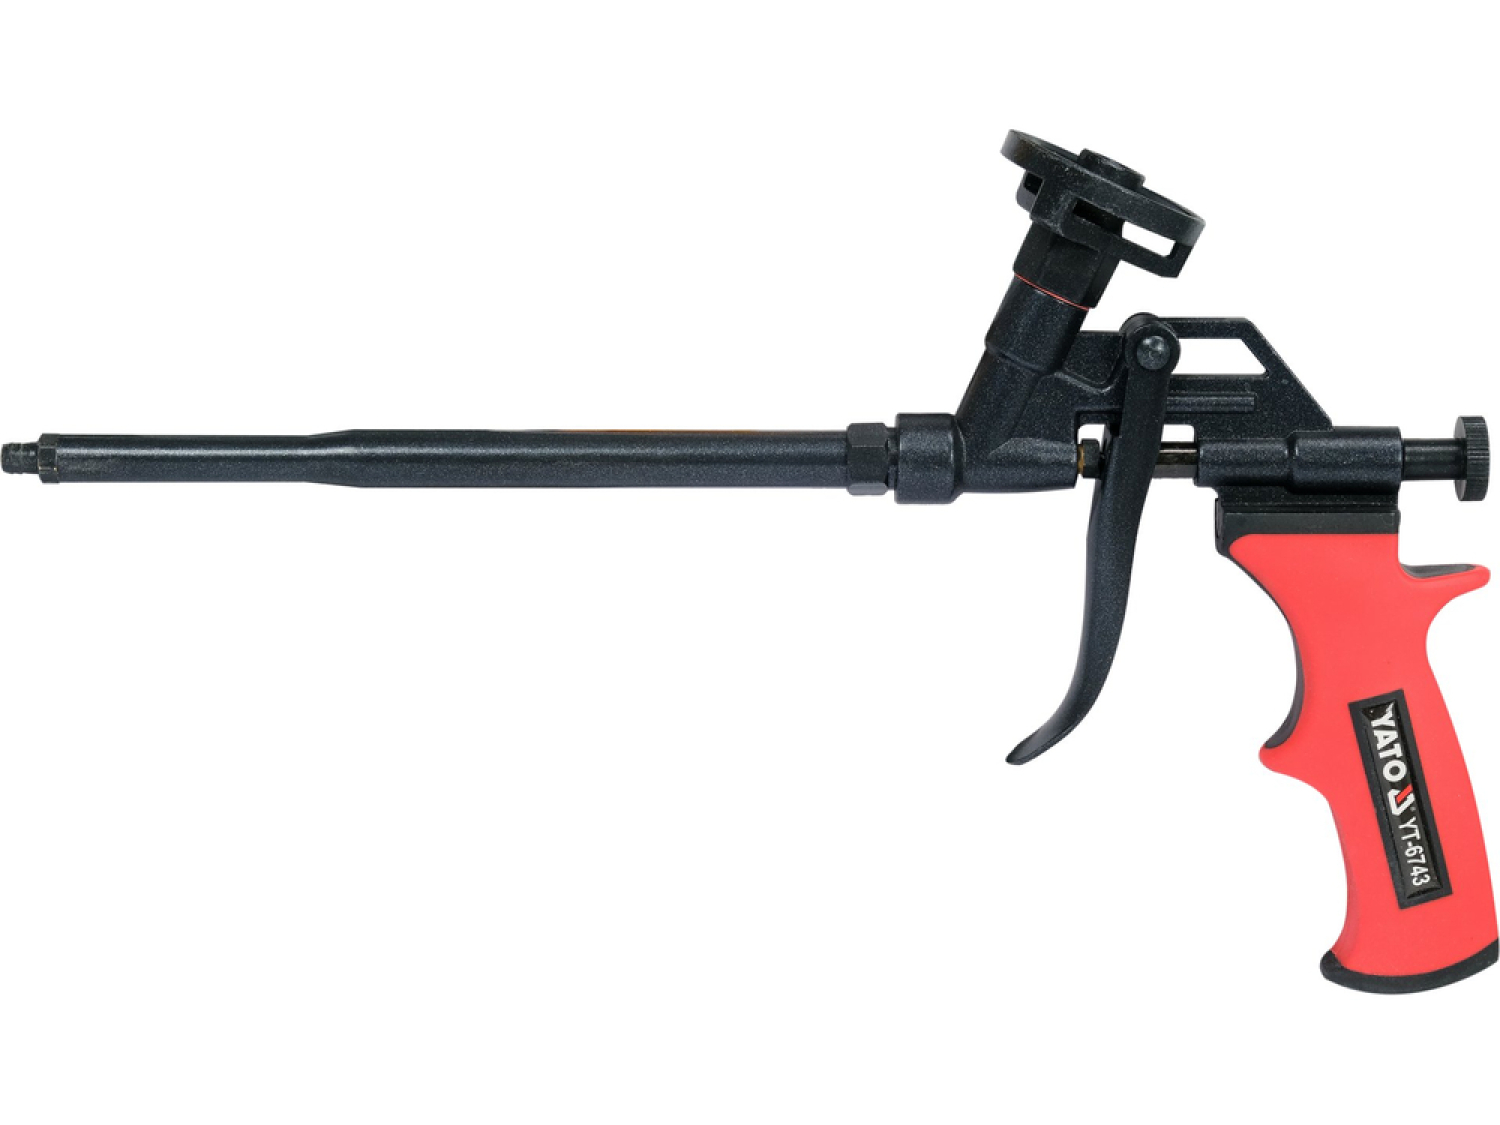
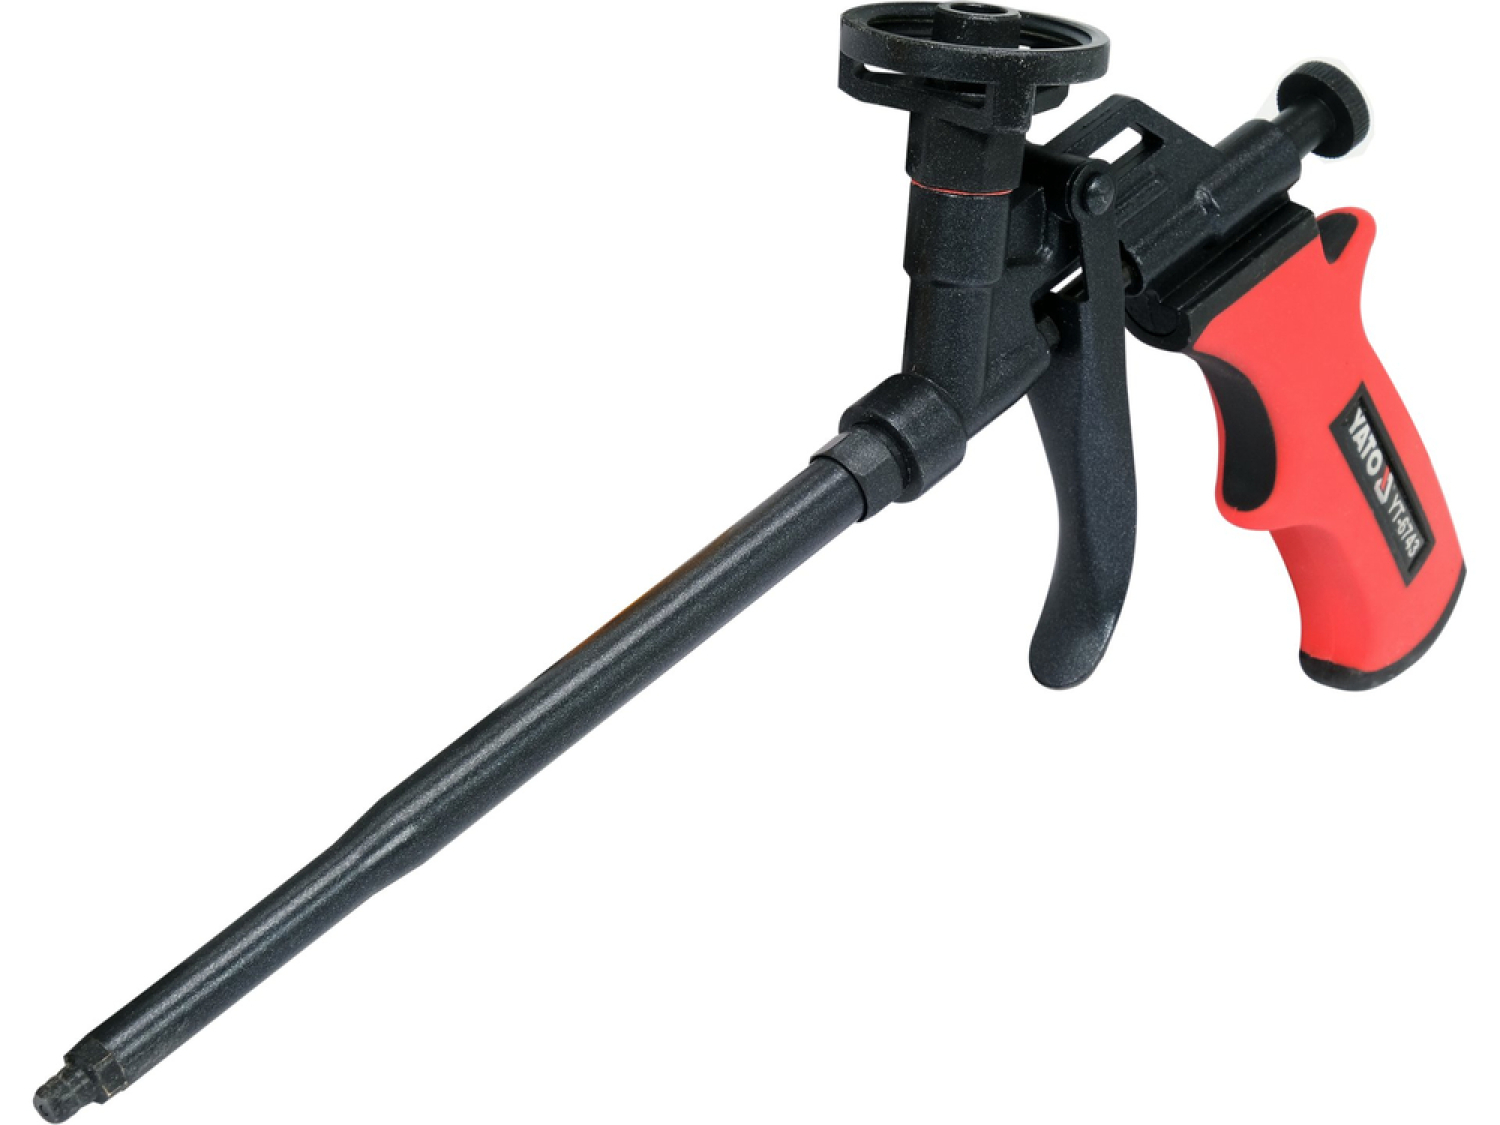
| Type | Putu pistole |
| Length, mm | 240 |
| Material | Aluminum; Brass |
| Virsmas apstrāde | PTFE coated |
| Handle | Polypropylene |
The YATO Foam Gun PTFE (model YT-6743) is designed for the application of polyurethane foams. It is crafted from high-quality materials including stainless steel, aluminum, and brass, ensuring durability and reliability. The parts most susceptible to damage from foam and corrosion are additionally protected with a PTFE coating.
Purpose:
This foam gun is essential for sealing, installing windows and doors, filling gaps in insulation, and insulating walls and roofs.
How to Use:
1. Start the Work:
- Shake the foam container vigorously for about 15 seconds.
- Screw in the adjustment screw located at the back of the gun to fully block the trigger lever.
- Remove the lid from the foam container, and screw the container into the gun nut until you feel resistance.
- Unscrew the adjustment screw by turning it counterclockwise until the threaded part appears, keeping it attached to the gun body.
- Press the trigger lever to fill the gun with foam. The gun is now ready for use; foam will be dispensed when the trigger is pressed, and releasing it will stop the flow. The foam output can be adjusted by turning the adjustment screw.
2. Post-Work Activities:
After completing work, turn the adjustment screw all the way to block the trigger lever. It is advised not to unscrew the foam container from the gun; maintaining a container attached (even partially filled) keeps the foam under pressure, preventing it from drying inside the gun. If the gun is not used for over a month, clean it with a mounting foam cleaner to avoid dried foam, which can only be removed mechanically.
3. Reusing the Gun:
Shake the gun with the container attached for about 15 seconds. Cut off the hardened foam tip with a sharp knife, turn the adjustment screw counterclockwise to release enough foam until the flow is uniform. Your gun is ready for use again.
4. Replacing the Container:
If foam ceases to flow, replace the container. Point the nozzle towards a waste receptacle and press the trigger until the gun is clear then immediately install a new container.
5. Cleaning the Gun:
Screw off the container and attach the spray tip to the cleaning agent container. Clean the residual foam on the gun, then reattach the cleaning agent container and fill the gun with the cleaning agent, letting it sit for about 10 minutes. Press the trigger to clean the interior thoroughly with the fresh cleaner. Remove the cleaning agent container and wipe the junction with a cloth, covering it lightly with Vaseline. Avoid using corrosive cleaning agents. For continuous usage, clean the gun every 2–3 months as described.
Usage Warnings:
Warning! Always use personal protective equipment when working.